
For years now I’ve been an avid follower of Boran2’s weekly series Saturday Painting Palooza. Each week he explains and shows how he progresses through the creation of his paintings. How he decides on colors, shades, shadowing, and elements of his art. It’s been cool to watch over time how the quality and precision of detail in his work has gotten better and more refined, like we were learning along with him. A very cool online series :o)
All along the way he’s encouraged others to share their own creations within the comments of his diaries and in doing that helped I’m sure to foster greater creativity in those of us, certainly me, who enjoy reading and following along every week. In fact, there’s an occasional series by CabinGirl called Knit-a-palooza where she and others like Diane101 and Denim Blue share their handiwork and art.
Being something of a painter myself I’ve decided to do a short series on one of my works. I’ve been encouraged by Boran and others to have a go at sharing a little of how I do what I do. So, taking their encouragement to heart I’ve decided to do a step by step series on how I’ve done one “flame job” on a customer’s truck. I hope you like it….
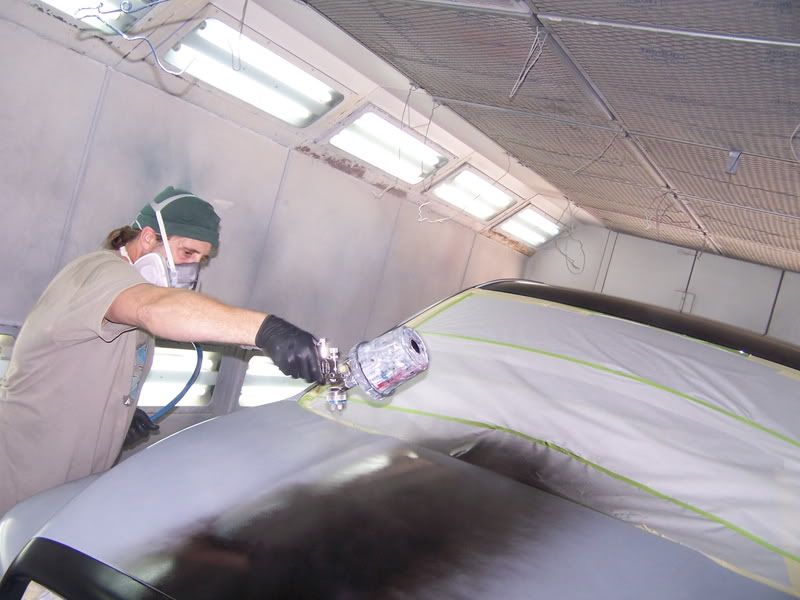
Like a canvas, each car, bike, or boat I do has to have a solid foundation to lay my work on top of. In this case a Dodge pickup truck that is originally black. This customer wanted to change the color of his truck but couldn’t really afford the expense of also repainting the insides of his doors, hood, tailgate, etc. What I’ve done is to take his original color and add a mixture of blue and violet pearl tints to the black which upon first look still appears as black, matching all the door jambs, etc. But that when viewed in the sunlight has bursts of bluish and violet pearlesscence. This achieves both desires of the customer.
So first, I apply this ground coat of black with pearl…
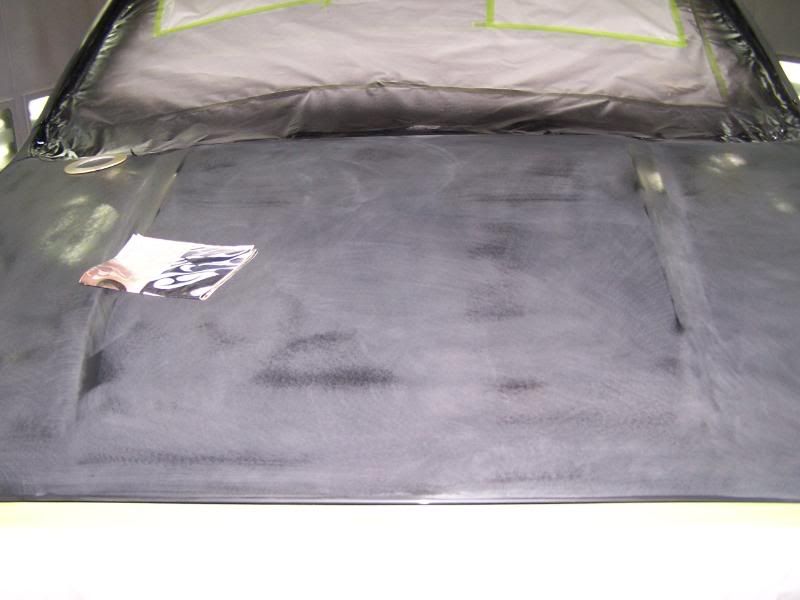
After applying as many coats of the black pearl as needed and being satisfied that it’s even, so on, three coats of clear are applied on top of the color to seal it down and to give me a solid surface to work on that won’t disturb the color underneath. When all is thoroughly dry I sand down and flatten the clear coat, making sure not to sand through anywhere. This is necesarry for the graphics to adhere properly. Another effect of applying clearcoats in between elements of graphic images is that the finished product has an added effect of depth. This is important to the overall quality of the finished work.
Now the truck is ready for the flames. This customer, as is often the case, brought in a picture that gave me a good sense of what he was looking for. It doesn’t mean the picture will be copied exactly, though sometimes I do that, but just gives a direction to go in and a grasp of what colors and shapes appeal to the customer.. Here’s what I was given,

You can see that there are two overlapping sets of flames. The first is actually the same color as the truck. Which means that the only element that defines it is it’s outline. In most cases a flame is a combination of colors and blends, fades, airbrushed 3-D effects, etc. that are different from the base color. All of which generally recieve an 1/8 inch outline or border.
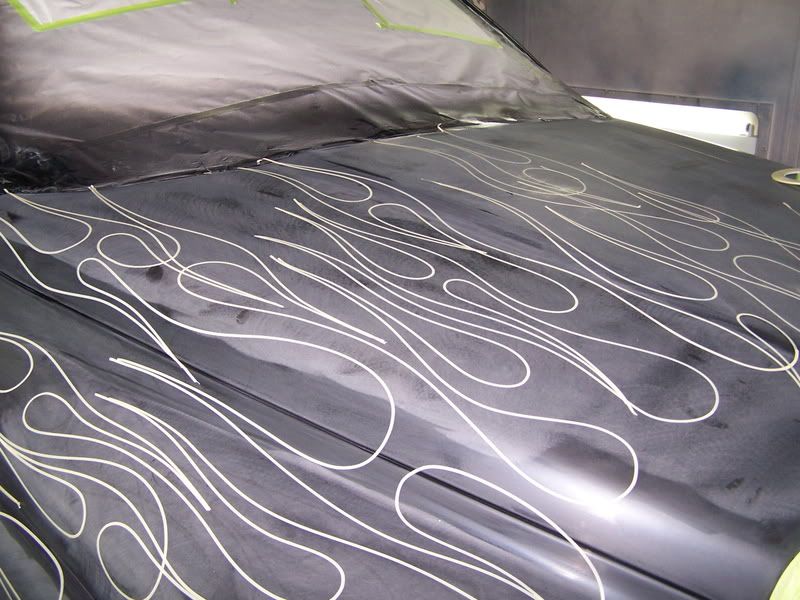
Here’s the part where I admit that there are some things that I don’t have the talent to pull off. Some things you can learn or at least fake. Others though, you are either born with or not. Let’s just say that my hand isn’t steady enough to use a pinstriping brush to create the 1/8″ outline, which could save an enormous amount of taping and time. On this job I decided to try and fake it. I’ll show how in a moment. But first, the next step is to lay out the outline of the flames with 1/8″ striping tape. The flames in the picture that I was given are called tribal flames. The ends, or licks of the flames as their called bend back in the opposite direction that the overall flame is going in. This is the outline applied to one half of the hood and one side of the truck<
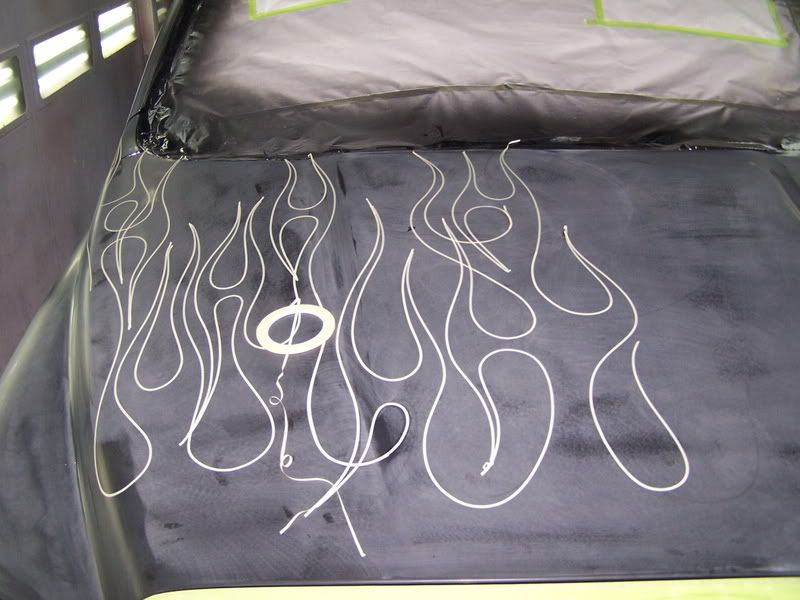
Here’s where I attempted to outline the flames by taking my unsteady hand and brushing the outline color on using the applied taped outline as one half of the stripe, trying to achieve a line clean enough to pass off as brushed,
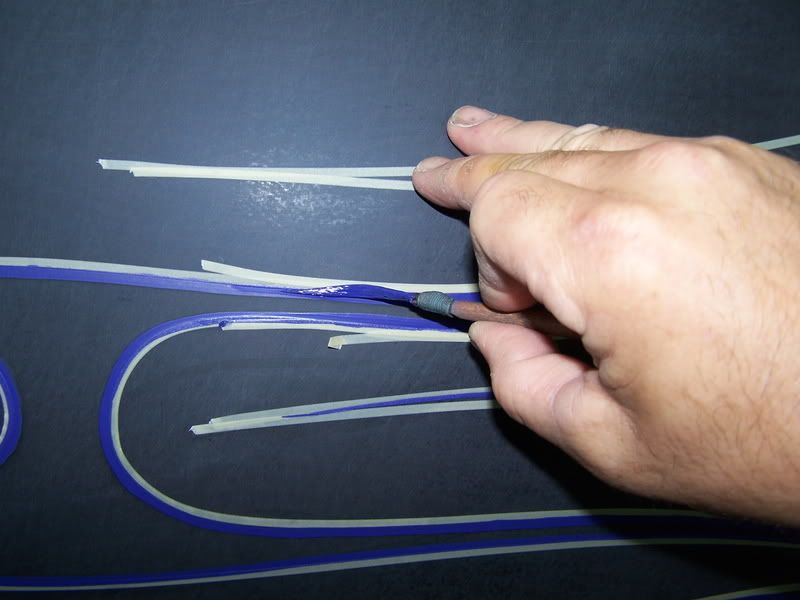
Unfortunately, even with the help of the tape line the finished painted outline was not clean and straight enough for my liking (I can be a bit picky).
Next week I’ll show how I went about getting the clean outline I wanted and how I was able to exactly duplicate the flame pattern onto the other side of the truck.
Peace


