

Hello again.
I’m a little late with my 2nd installation of the PPPP.
Last week I began a two layered flame job on a Dodge truck. At the end I explained how I wasn’t satisfied with the quality of the outline I’d attempted to freehand with a brush. This week I’ll explain and show how I managed to acheive a clean line by cheating with tape….
Okay,
so having failed with the brush I removed all the tape and the paint and retaped the entire right side of the hood and side of the truck. My first hurdle is how to recreate the taped pattern onto the other side of the truck and the hood. When taping out two separate sides of any job it’s okay to have a few differences here and there because minor differences are pretty hard to pick up on when you have to walk from one side to the other to see both sides. The eye and the mind aren’t quick enough or perceptive enough to catch all inconsistencies. The hood though, is a different story since everything is right in front of you. Also, more attention is usually paid to hoods because they are more like a canvas to begin with and most art work, whether flames or something different has it’s main theme that originates and flows out from the hood.
Many graphic artists can free hand tape a duplicate of an original pattern, only in reverse. I can’t. Part of the problem for me is the difference between how my left hand and right hand (right brain, left brain) react to what I’m seeing. My left hand is far less adept than my right. Duh! That difference is why I generally begin flames from the right side of a car, truck, etc. My hands and eyes somehow cooperate more naturally that way :o)
Alright. What I do is to lay white, somewhat transparent paper over the taped out right side and using a large black crayon I sweep over the tape, which leaves a decent representation of the outline underneath. I’m also careful to highlight landmarks, like hood edges, door handles and windows so I can be more accurate in laying the stencil out on the other side…
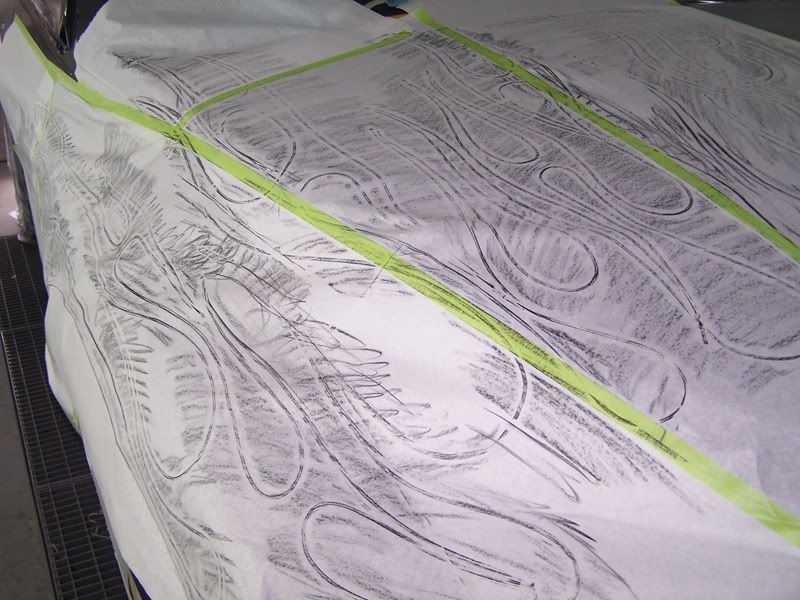
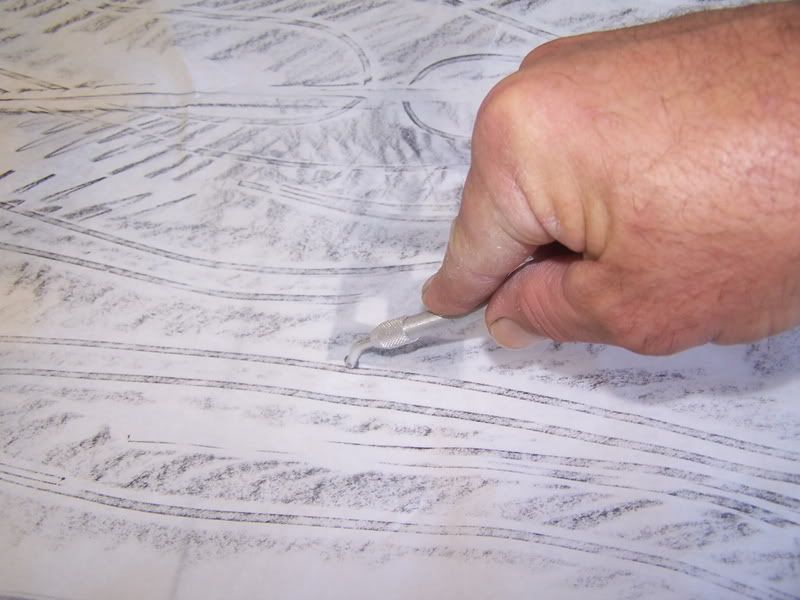
Once I’ve done this I remove the paper as one large piece and lay it out on a large piece of cardboard. I then use a tool called a pouncewheel ( a glorified, miniature pizza cutter) to trace out all of the lines on the paper. The pouncewheel has little teeth on it that leave a perforated line along the trace route….
Btw, I’m not fond of this part of the process because it’s tedious and time consuming. Imagine doing this multiple times to reproduce multiple layers of an image on a 40′ boat! Great googly moogly :o) Some day I’ll be able to afford the computer and programs, along with a plotter, which is a machine that takes computer generated images and cuts them into stencils that can be applied to any vehicle or object you want to paint on. Till then? We do it the old fashioned way.
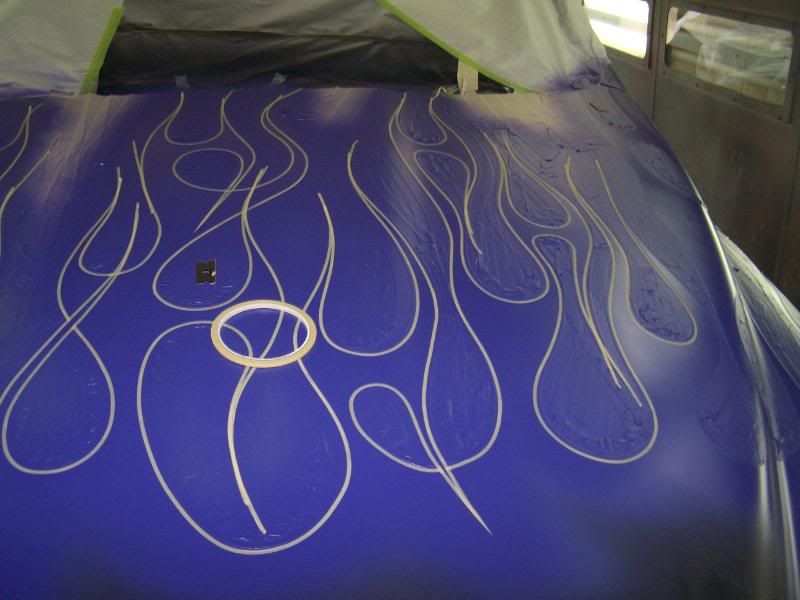
Now I take the paper and turn it over and lay it out on the left side of the truck. Making sure to align all landmarks. Especially at the center of the hood. I have a sock that is filled with blue carpenter’s chalk that I wipe over all the perforated lines…
Taking the paper off, this is what I get…

I have to blow off the bulk of the chalk without blowing away the lines because the tape won’t stick to the hood well. It’s a pain in the ass process, but it works.
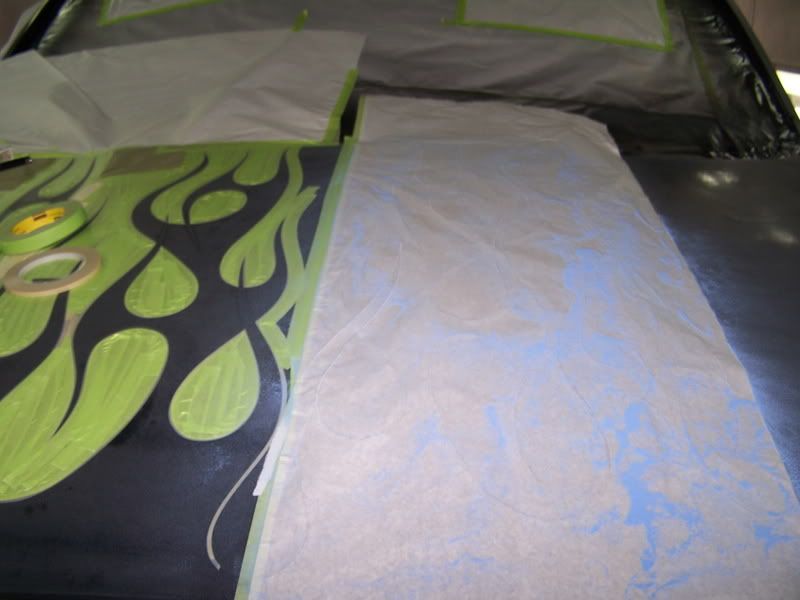
Here’s what it looks like after I’m done laying out all of the outline and filling in all areas that won’t get painted with masking tape…
So far, so good, right? :o)
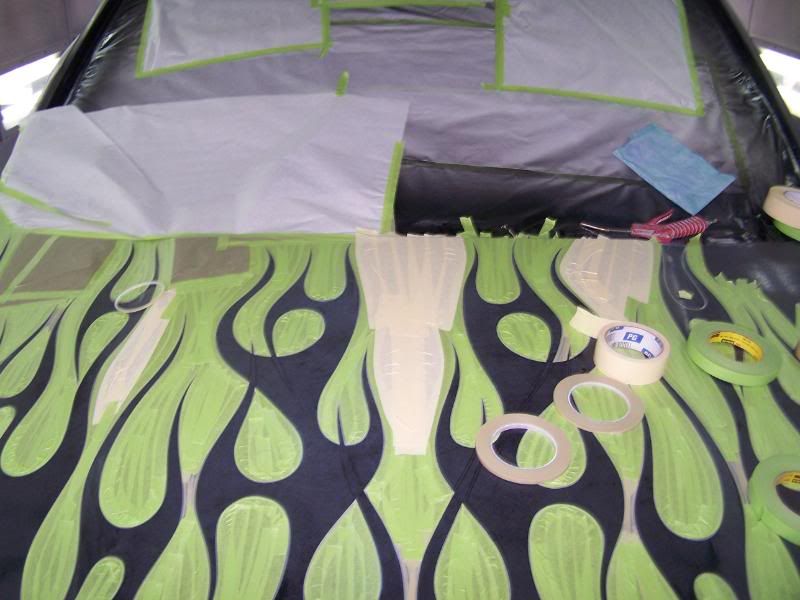
Now I take the lilac color I’d mixed up for the outline and spray it inside all my taped lines. After waiting about ten minutes for the color to flash off (dry and flatten) I take the same 1/8″ tape I used for the outline and run it over the whole pattern making sure to place it just inside the outside edge of the original outline. What I’m doing then is to cover an 1/8″ stripe of lilac around the whole deal…

…..
This is a very tedious, time and material consuming process. Which is why I attempted to brush the first flame out to begin with. I wanted to avoid this part.
After finishing the laying out of the outline within an outline, it’s also necesarry to use regular masking tape, in this case the wide, green tape, to cover over the miniscule gap that lies between the original outline and the line I’ve just placed inside of it because if I don’t the next color sprayed on will show up in spots along the lilac outline. With this particular job it’s not as important because this first flame is the same color as the body of the truck and any littrle overlaps here and there probably wouldn’t degrade the quality of the work much, but I like it to be as clean as possible. If I were spraying the flame a different color altogether then skipping this step would make for a totally sloppy and crappy outline as that color would show up randomly between the lilac outline and the body color on the outside edge of the flame outline. Brains hurting yet?! LOL! I know, it can be boring to read all of this.
So, once again I have to go over the entire image…

Finally (yea, I’m just about done!), I’m finished with all the taping for the first flame. I take the original body color, black with pearl added, and spray in the entire flame…

Holy M..M..M..Moly!! That’s a lot of taping! LOL! Better get my ass to pinstriping school, eh? :o) That, or invest in 3M stocks and bonds so I can profit off of all the tape I’m eating up! :o)
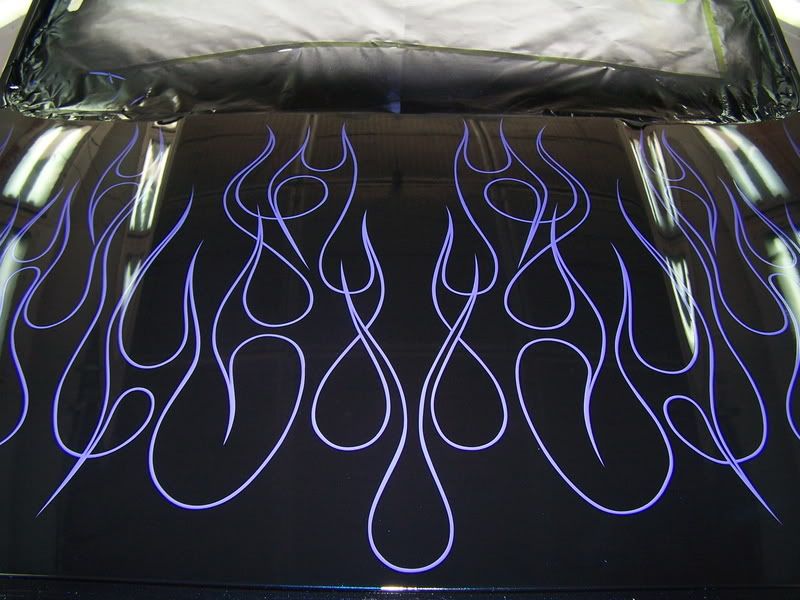
Now comes the fun part. The Christmas morning part! :o)….untaping everything and getting a first look at the flame. It’s important not to get too eager to see it all untaped and pull it all off to fast or haphazardly because these paints can be fragile and sensitive and do pull away some times in places you don’t want them to. Regardless of how careful you are though, imperfections in the lines are part of the deal. So, there are touchups to be done before finalizing it and clearing over the entire thing.
Having gone around and cleaned it all up and being satisfied with the way it looks, I go ahead and bury it all under three coats of clear.
…And now, boys and girls, here’s something we hope you’ll really like!!….

A lotta work for one little outline, huh?! :o)
Please join us next week when we do it all over again! LOL! Wait till you see the mess I make with tape then :o)

